When purchasing VPN from providers, you are often faced with the fact that the resources of the server on which the VPN server is installed will be distributed among many users of this server. Because of this, during peak hours of server load, users are faced with the fact that the connection speed drops or the connection becomes unstable. It’s easy to avoid this if you install your VPN server anywhere in the world, renting a VPS from MyHosti International, and enjoy a stable and secure connection. In addition, you can share the VPN key with your loved ones and stay connected wherever you are. We are sharing the easiest way to install VPN Outline using ubuntu 24.04 as an example:
Outline using ubuntu 24.04 as an example (you will need a VPS with ubuntu 24.04)
- Download the Outline manager from the official website https://getoutline.org to your computer
- Install and launch the Outline manager on your computer
-Connect to the VPS via ssh (if your computer is running OS Windows, then use, for example, PuTTy, if MacOS, then the usual Terminal pre-installed in the system will do)
- So, we connected to the server via SSH, then we execute the following commands:
- $ sudo apt update && apt upgrade
(with this command we update the package index in the Linux system or package lists and update the packages themselves, we also update security)
- $ sudo bash -c "$(wget -qO- https://raw.githubusercontent.com/Jigsaw-Code/outline-server/master/src/server_manager/install_scripts/install_server.sh)"
(run the Outline installation script on our server)
- Next, if Docker is not installed, a message like this may appear: Would you like to install Docker? This will run 'curl https://get.docker.com/ | sh'. [Y/n] . Everything here is also simple - in the question line that appears, enter: y and then Enter
- After executing the command, copy the entire line in the terminal (highlighted): {"apiUrl":"https://192.248.x.x:9xx2/JwMCurCFq1m7bjbjQg","certSha56":"B7B364B109C21390C0F5C4FBA71373767D45н4н5D6989AE7B FC48265"}
- Go to the Outline manager application, which we have already downloaded and installed on your computer, select “Set up Outline anywhere”
- In window 2: paste the copied line from the terminal, then you’re done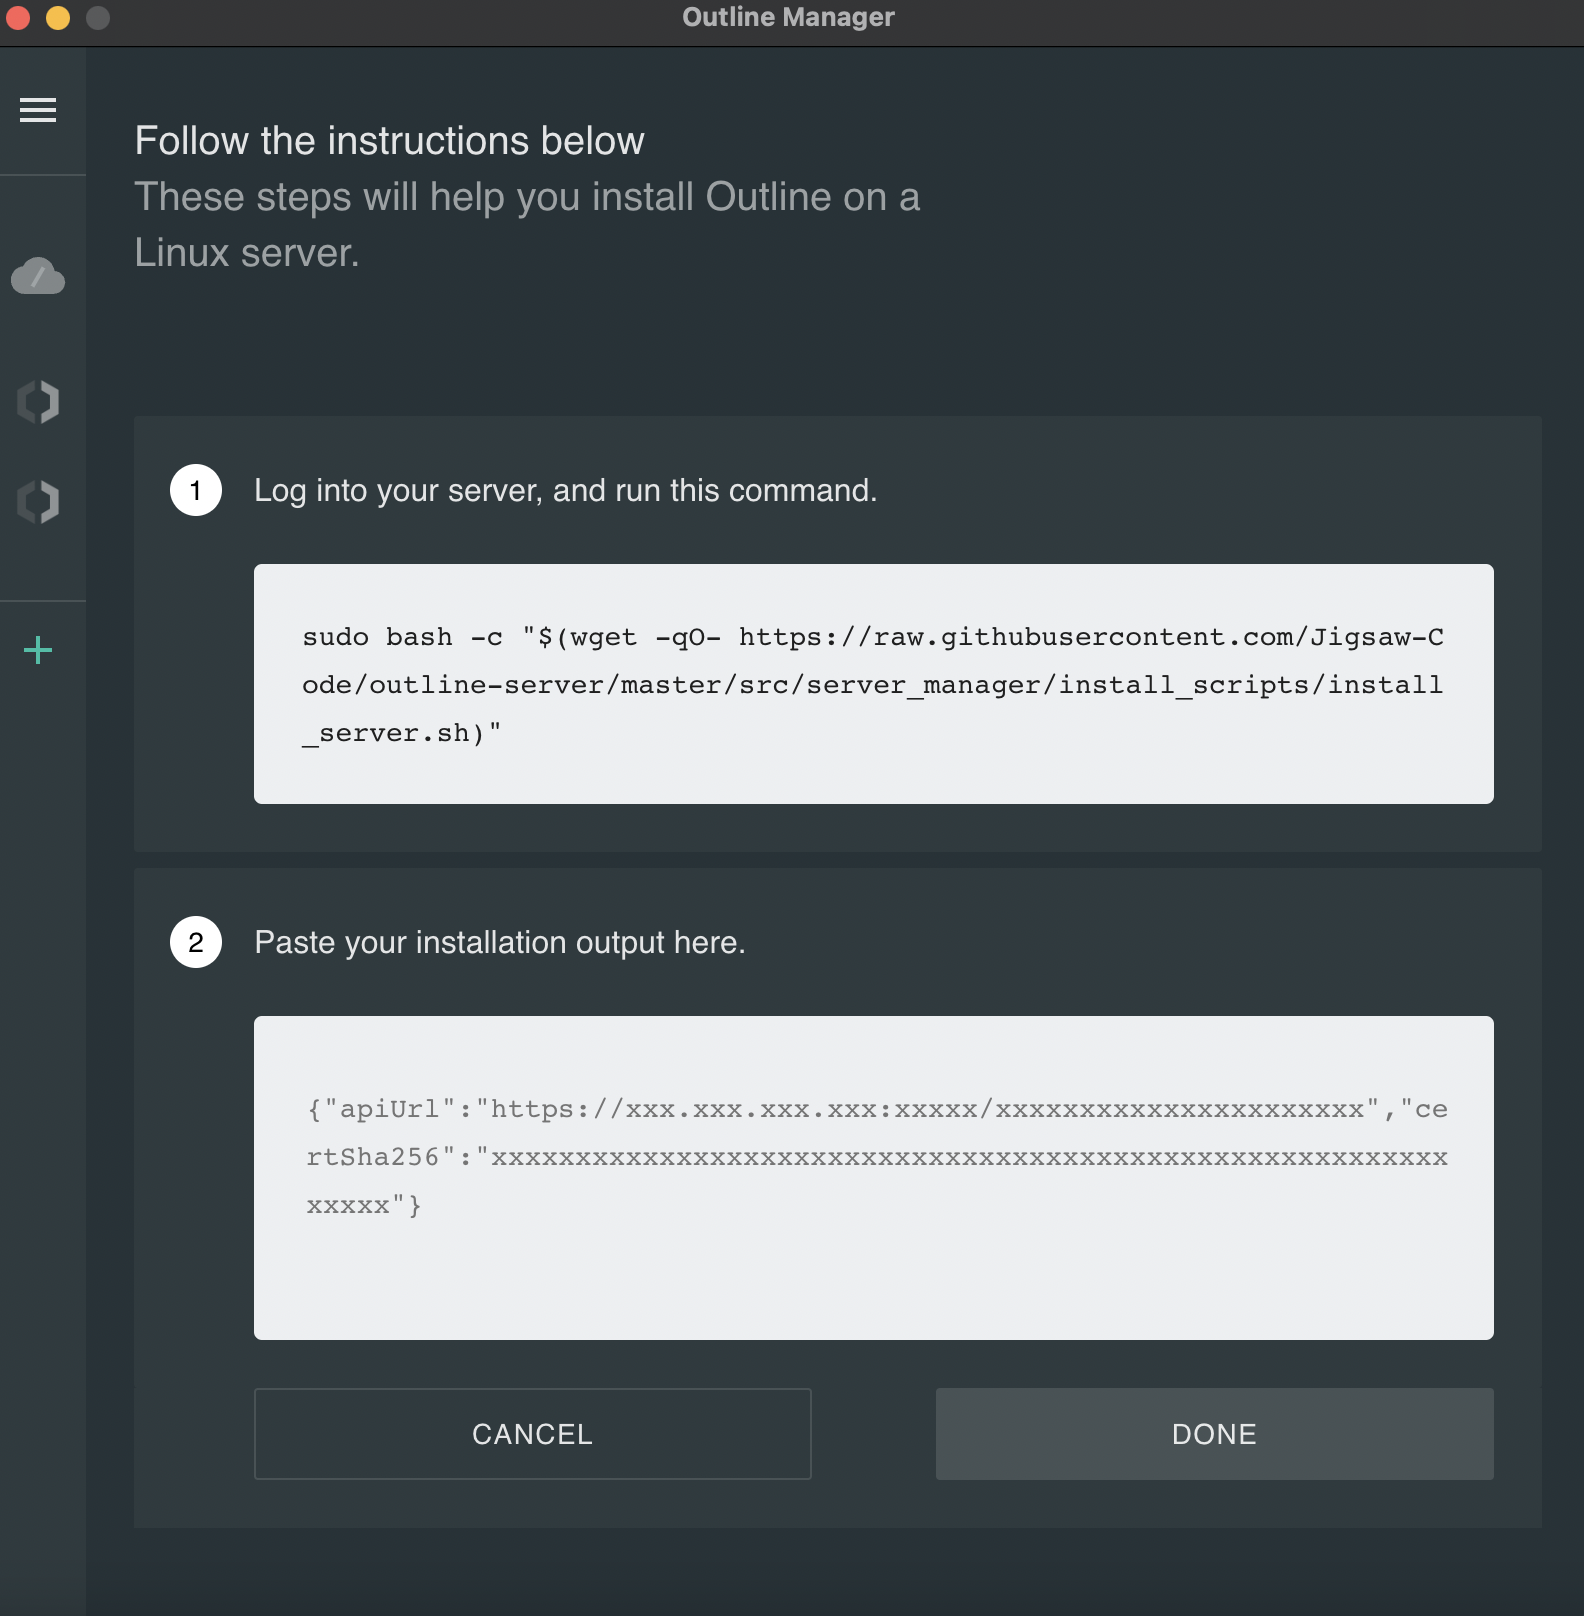
- A situation may arise when a message appears in the Outline manager that the Outline server has been created, but it is impossible to connect, in which case it is necessary to allow incoming connections on the server through the terminal. To do this, use the following commands on your server:
1. To start working with UFW you will need a superuser (root), but it is also possible to execute commands under sudo (if the user is different from root, for example, ubuntu)
2. The UFW utility is pre-installed on the system. If for some reason it is missing, you can install it using the command:
- $ sudo apt-get install ufw
- You can check the UFW status using the command:
- $ sudo ufw status verbose
- If you need to enable UFW, use the command:
- $ sudo ufw enable
- Next, we allow incoming connections:
- $ sudo ufw allow ssh
- Next, add a range of ports indicating a specific protocol, Outline requires the following range open 1024:65535, for this we use the following command:
- $ sudo ufw allow 1024:65535/tcp
- After that, in the Outline manager, click repeat.
- Download the Outline client to your device (phone, laptop, etc.)
In the Outline Manager application, copy the access key and paste it into the client. That's all, enjoy)
Share: